Overview
In this tutorial, we show you how to install Ubuntu Desktop in VMware Workstation on Windows.Watch Video tutorial
Download Ubuntu Desktop Image
Go to Ubuntu website and select Download Ubuntu Desktop.Download the latest LTS version of Ubuntu for desktop here: https://www.ubuntu.com/download/desktop
Or Download the Ubuntu 14.04.5 LTS here: http://releases.ubuntu.com/14.04/
Download VMware Workstation
VMware Workstation here: https://www.vmware.com/products.htmlOpen VMware Workstation and configuration
Select the "Create a New Virtual Machine" buttonChoose "Custom (advanced)", then click the "Next".
Click the "Next".
Select "I will install the operating system later" lets you manually install the operating system after the initial setup, then click "Next".
"Guest operating system" select options "Linux", and version "Ubuntu 64-bit", then click "Next".
Browse "Location" and enter "Virtual machine name", then click "Next".
Select the number of processors and cores, click "Next".
Select the amount of RAM, "Memory for this virtual machine", Select "Next" when finished.
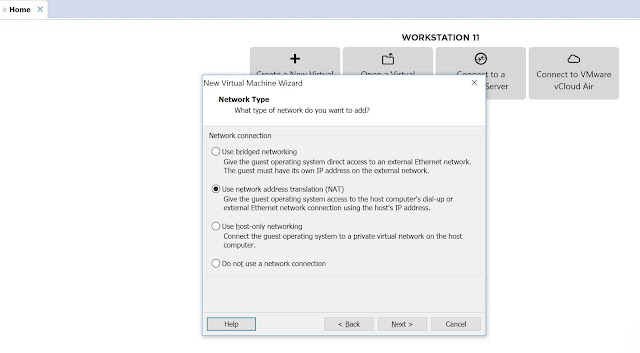
Select the type of network to use on the VMware Workstation. Select "Use network address translation (NAT), then click "Next".
Select I/O Controller Types, leave this default and select "Next".
Select a Disk Type, leave this default and select "Next".
Select a Disk, use the "New virtual disk" option, finished the "Next".
Choose the maximum disk size (GB), and select "Store virtual disk as a single file", then click "Next".
Specify Disk File, where would you like to store the disk file. Then click "Next".
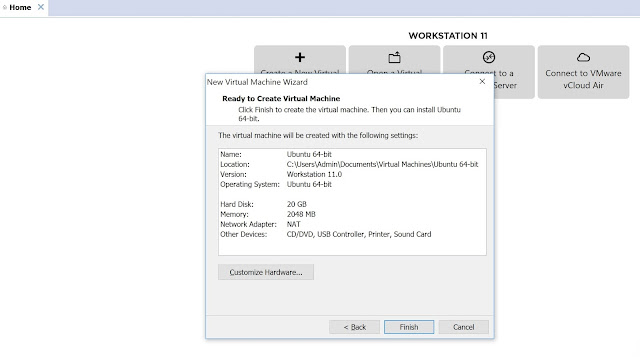
Review the VMware settings and click "Finish" button.
Click on "Edit virtual machine setting", Select the "CD/DVD(SATA)". You will see "Use ISO image file" at the right . Click on it and locate the ISO file of operating system. Then click on OK.
Click on "Power on this virtual machine", then install Ubuntu following the instructions.


