Overview
In this tutorial, we show you how to add Back Button to Toolbar on Android.Follow the steps mentioned below to develop this application.
Project Structure
Creating the Android Project
Open Android Studio and create a new project with an empty activity called MainActivity.javaCreate an 'About' button
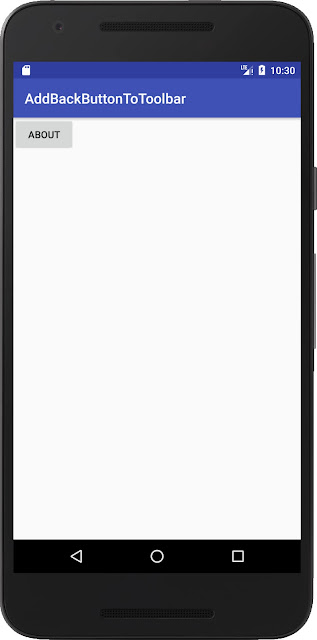
Add Button widget to activity_main.xml layout. Change the activity_main.xml layout to the following.<?xml version="1.0" encoding="utf-8"?>
<android.support.constraint.ConstraintLayout xmlns:android="http://schemas.android.com/apk/res/android"
xmlns:app="http://schemas.android.com/apk/res-auto"
xmlns:tools="http://schemas.android.com/tools"
android:layout_width="match_parent"
android:layout_height="match_parent"
tools:context=".MainActivity">
<Button
android:id="@+id/btnAbout"
android:layout_width="wrap_content"
android:layout_height="wrap_content"
android:text="About"
/>
</android.support.constraint.ConstraintLayout>
And then cast 'About' button with Button class and set ClickListener in MainActivity.java class to start About Activity
package com.jackrutorial.addbackbuttontotoolbar;

import android.content.Intent;
import android.support.v7.app.AppCompatActivity;
import android.os.Bundle;
import android.view.View;
import android.widget.Button;

public class MainActivity extends AppCompatActivity {

    Button btnAbout;

    @Override
    protected void onCreate(Bundle savedInstanceState) {
        super.onCreate(savedInstanceState);
        setContentView(R.layout.activity_main);

        btnAbout = (Button) findViewById(R.id.btnAbout);

        btnAbout.setOnClickListener(new View.OnClickListener() {
            @Override
            public void onClick(View v) {
                Intent intent = new Intent(MainActivity.this, AboutActivity.class);
                startActivity(intent);
            }
        });
    }
}
Create the About Activity
Right Click on app. Select New > Activity > Empty Activity. In the dialog that appears, enter AboutActivity as activity name.Add TextView widget to activity_about.xml layout. Change the activity_about.xml layout to the following.
<?xml version="1.0" encoding="utf-8"?>
<android.support.constraint.ConstraintLayout xmlns:android="http://schemas.android.com/apk/res/android"
    xmlns:app="http://schemas.android.com/apk/res-auto"
    xmlns:tools="http://schemas.android.com/tools"
    android:layout_width="match_parent"
    android:layout_height="match_parent"
    tools:context=".AboutActivity">

    <TextView
        android:layout_width="wrap_content"
        android:layout_height="wrap_content"
        android:text="This is Back Button Toolbar Android Example at JackRutorial.com"
        />

</android.support.constraint.ConstraintLayout>
Change the AboutActivity class to the following.
package com.jackrutorial.addbackbuttontotoolbar;

import android.support.v7.app.AppCompatActivity;
import android.os.Bundle;
import android.view.MenuItem;

public class AboutActivity extends AppCompatActivity {

    @Override
    protected void onCreate(Bundle savedInstanceState) {
        super.onCreate(savedInstanceState);
        setContentView(R.layout.activity_about);

        setTitle("Back Button Toolbar");
        getSupportActionBar().setDisplayHomeAsUpEnabled(true);
    }

    @Override
    public boolean onOptionsItemSelected(MenuItem item) {
        switch (item.getItemId()) {
            case android.R.id.home:
                finish();
                return true;
        }

        return super.onOptionsItemSelected(item);
    }
}
In the snippet code above, we call getSupportActionBar().setDisplayHomeAsUpEnabled(true); to allow up navigation with the app icon in the action bar and the user presses it, your activity receives a call to onOptionsItemSelected(). The ID for the action is android.R.id.home.
Config the Parent Activity in AndroidManifest.xml file
Open AndroidManifest.xml file and update file as below.<?xml version="1.0" encoding="utf-8"?>
<manifest xmlns:android="http://schemas.android.com/apk/res/android"
package="com.jackrutorial.addbackbuttontotoolbar">
<application
android:allowBackup="true"
android:icon="@mipmap/ic_launcher"
android:label="@string/app_name"
android:roundIcon="@mipmap/ic_launcher_round"
android:supportsRtl="true"
android:theme="@style/AppTheme">
<activity android:name=".MainActivity">
<intent-filter>
<action android:name="android.intent.action.MAIN" />
<category android:name="android.intent.category.LAUNCHER" />
</intent-filter>
</activity>
<activity
android:name=".AboutActivity"
android:parentActivityName=".MainActivity"
>
<!-- Parent activity meta-data to support 4.0 and lower -->
            <meta-data
                android:name="android.support.PARENT_ACTIVITY"
                android:value=".MainActivity" />
</activity>
</application>
</manifest>
With Android 4.1 API level 16 and higher we can declare the logical parent of each activity by specifying the android:parentActivityName=".MainActivity" attribute in the <activity> element. Else Android 4.0 and lower we add a <meta-data> element inside the <activity>.
<!-- Parent activity meta-data to support 4.0 and lower -->
<meta-data
android:name="android.support.PARENT_ACTIVITY"
android:value=".MainActivity" />
Run app on the Android Emulator
You can run this app from an Android Studio project. Or you can run this app that's been installed on the emulator as you would run any app on a device. To start the emulator and run this app in your project.- Open Android Studio project and click Run.
- In the Select Deployment Target dialog, select an existing emulator definition, and then click OK.
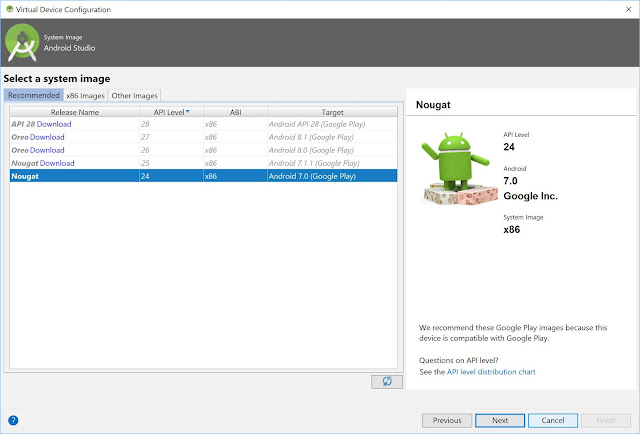
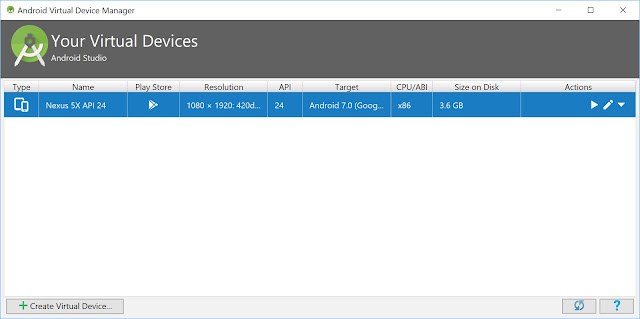
- If you don’t see a definition you want to use, click Create New Virtual Device to launch the AVD Manager. After you define a new AVD, in the Select Deployment Target dialog, click OK.
- If you want to use this emulator definition as the default for your project, select Use same selection for future launches.


